


NOTE: This blog uses Keychain Access from Mac. Other OS will have different steps that are not covered here.
Sometimes our clients have an idea for an application and want to create an MVP in order to test it on the market. In most cases, they want to use their Individual Apple account instead of an organizational one since they don’t have an Apple Organization account.
In this blog, I’ll show you how to distribute an iOS application to Testflight or App Store using a client’s individual account by creating and managing certificates and provisioning profiles.
What’s the difference between Organizational and Individual accounts?
When the clients have an organizational account, they can create users with the ability to create and manage Distribution and Developer certificates. With an Individual account, only the owner is allowed to create the certificates, identifiers, and profiles, unless they have prior knowledge about this topic, the distinction can throw off clients.
Why should I care about code signing certificates?
Code signing, certificates, and provisioning profiles can be confusing for anybody unfamiliar with handling them. They were a bit confusing for me when I first started in the mobile development world.
Apple offers excellent documentation for everything you need, but when it comes to certificates and distribution to the Apple Store, things can get tricky.
All iOS applications must be built by trusted developers (Apple Development Certificate) and distributed by trusted companies (Apple Distribution Certificate). Code signing is the process of digital signing that guarantees the code was built by the author and has not been changed or corrupted since it was signed.
We can not install or distribute an app using only certificates, which is why Provisioning Profile rocks at helping us finish the job.
Provisioning Profile:
It’s a bundle that contains a set of development or distribution Certificates, Unique Device Identifiers, and an App ID.
Development Certificates:
The devices specified in the Development Provisioning Profile can be used for testing, but only by those individuals whose Development Certificates are included in the profile.
Distribution Certificates:
The Distribution Provisioning Profiles don’t specify any Device IDs, which is what we will use to distribute our application on the AppStore.
I highlighted distribution and development words to avoid confusion between those different types of Profiles.
How do you generate the certificates for a developer using a client’s Individual account?
There are a few prerequisites that you and your client need to complete in order to distribute the app.
[Client]
- Have an Individual Apple developer account
[Developer]
- A Macbook computer
- Have the XCode IDE installed on your Mac
- Have an Apple developer account associated with the client account
What will we do?
- Create a Certificate Signing Request (CSR)
- Create an Apple Distribution Certificate
- Create or update the app identifier (bundle id)
- Create an AppStore Distribution Provisioning Profile
- Associate the Provisioning Profile to XCode
1. [Client] Certificate Signing Request (CSR)
Let’s create a Certificate Signing Request from the Keychain Access Application. This will create a certSigningRequest file. Once Apple approves the request, it will issue a certificate for you.
- Open the Keychain Access app
- Go to Certificates Assistant -> Request a Certificate from a Certificate Authority
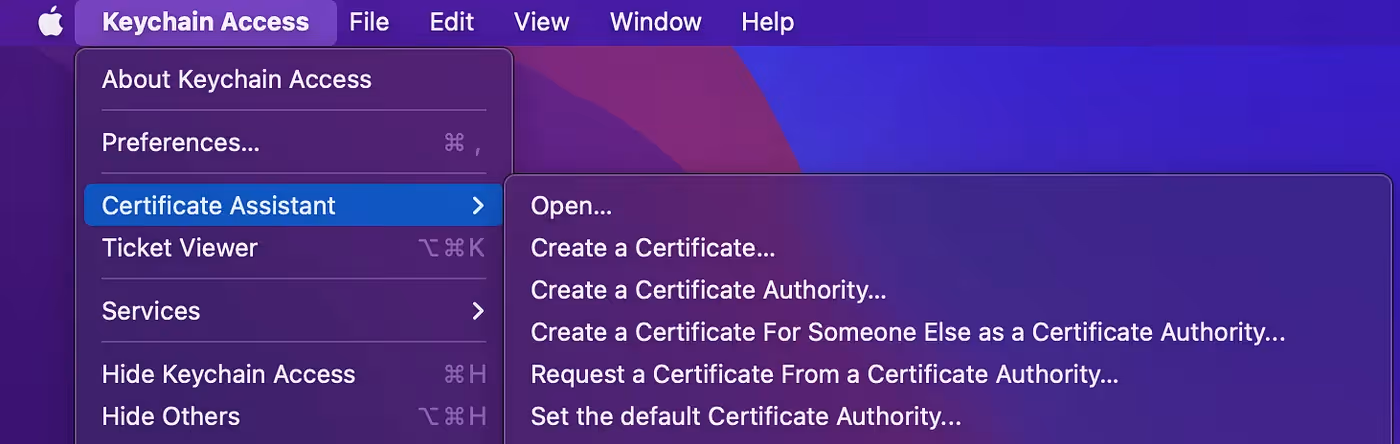
- This will show up the Certificate Assistant wizard
- Put your email address and your name, and select the “Saved to disk” option, then press continue
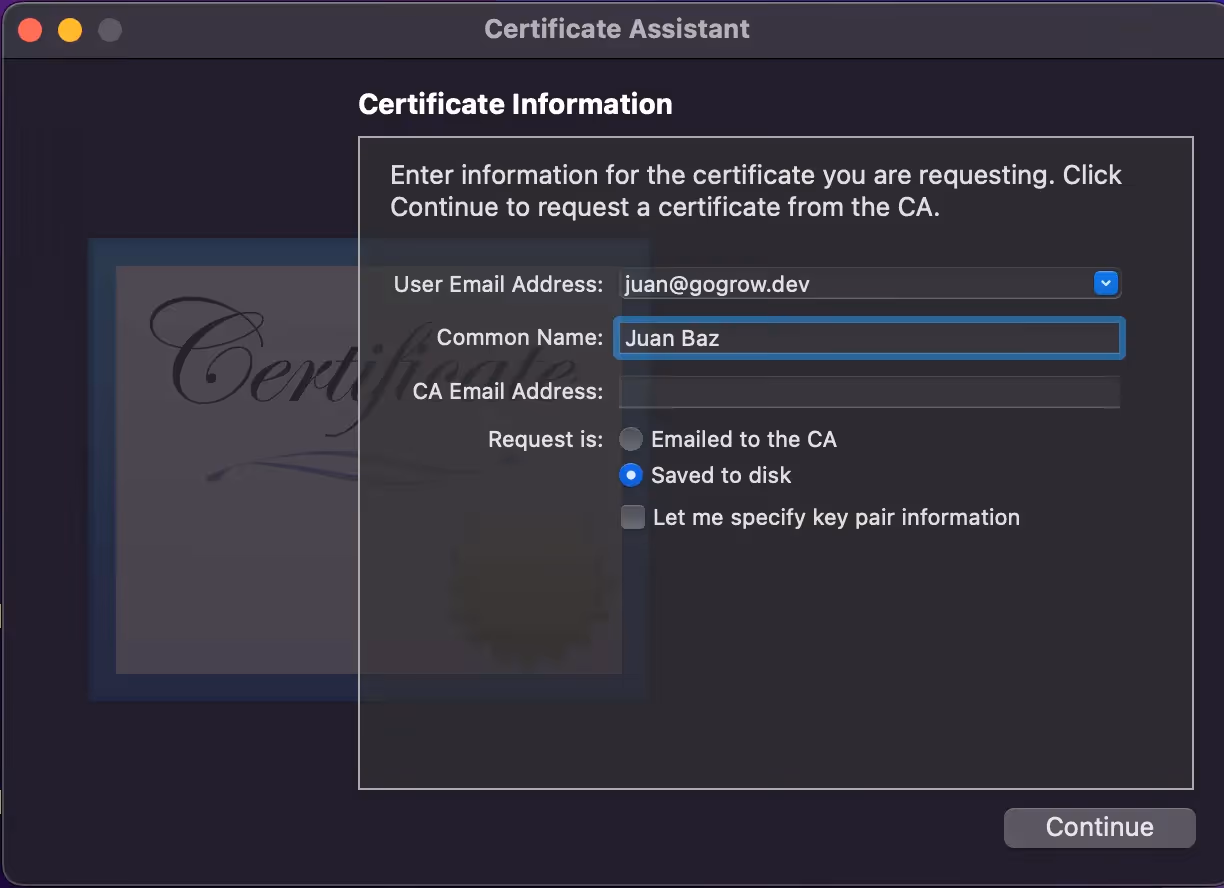
- Give it a certificate name and save it in your drive
2. [Client] Create a distribution certificate
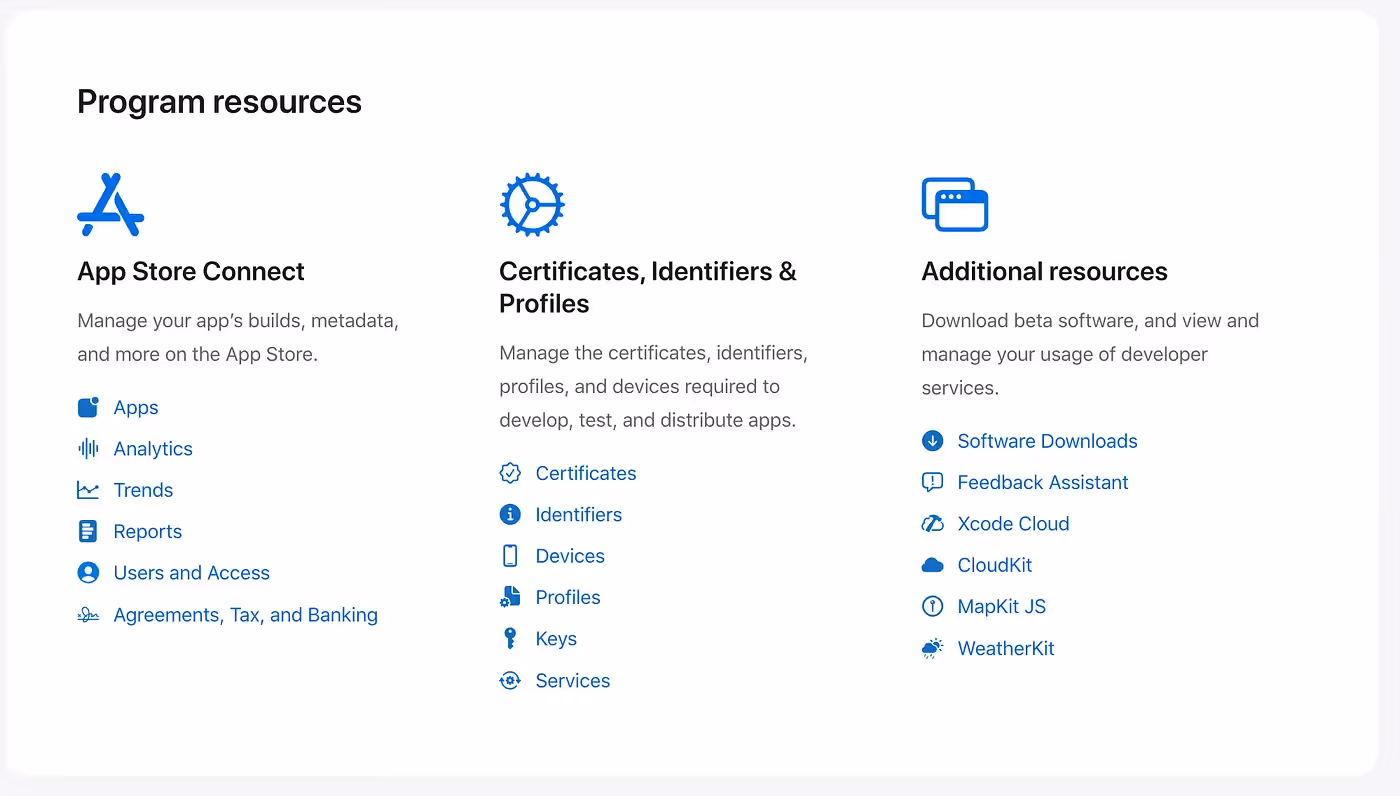
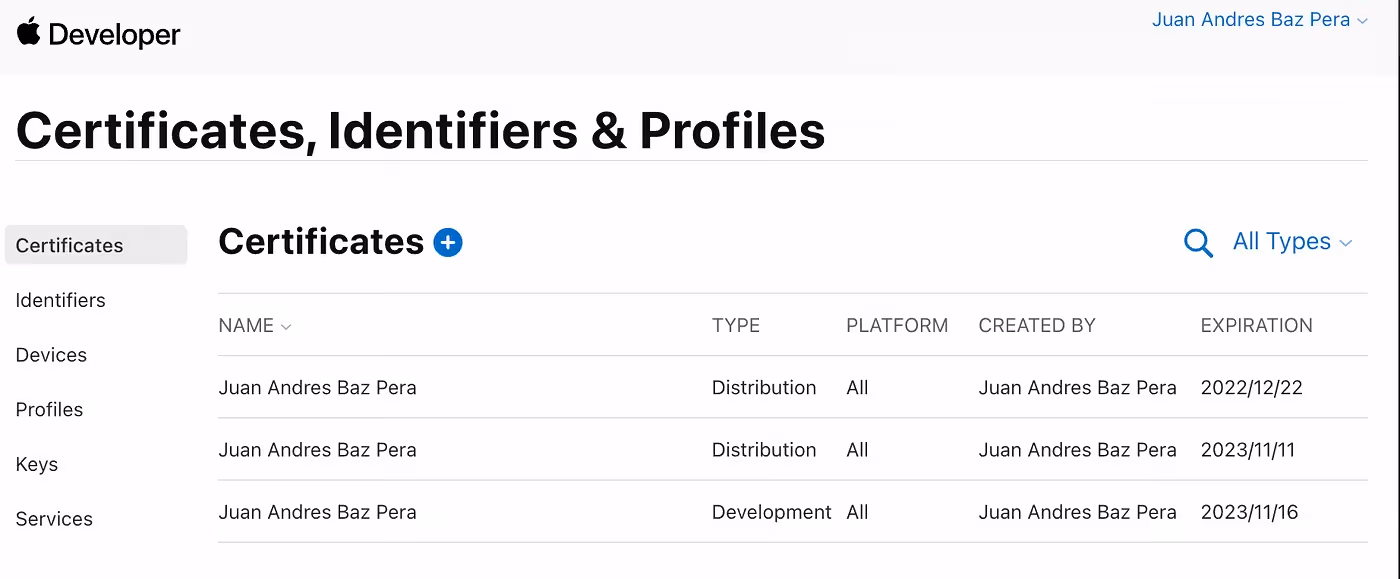
- Login to the Apple Developer account -> Certificates, Identifiers & Profiles -> Certificates, or quick link to Certificates
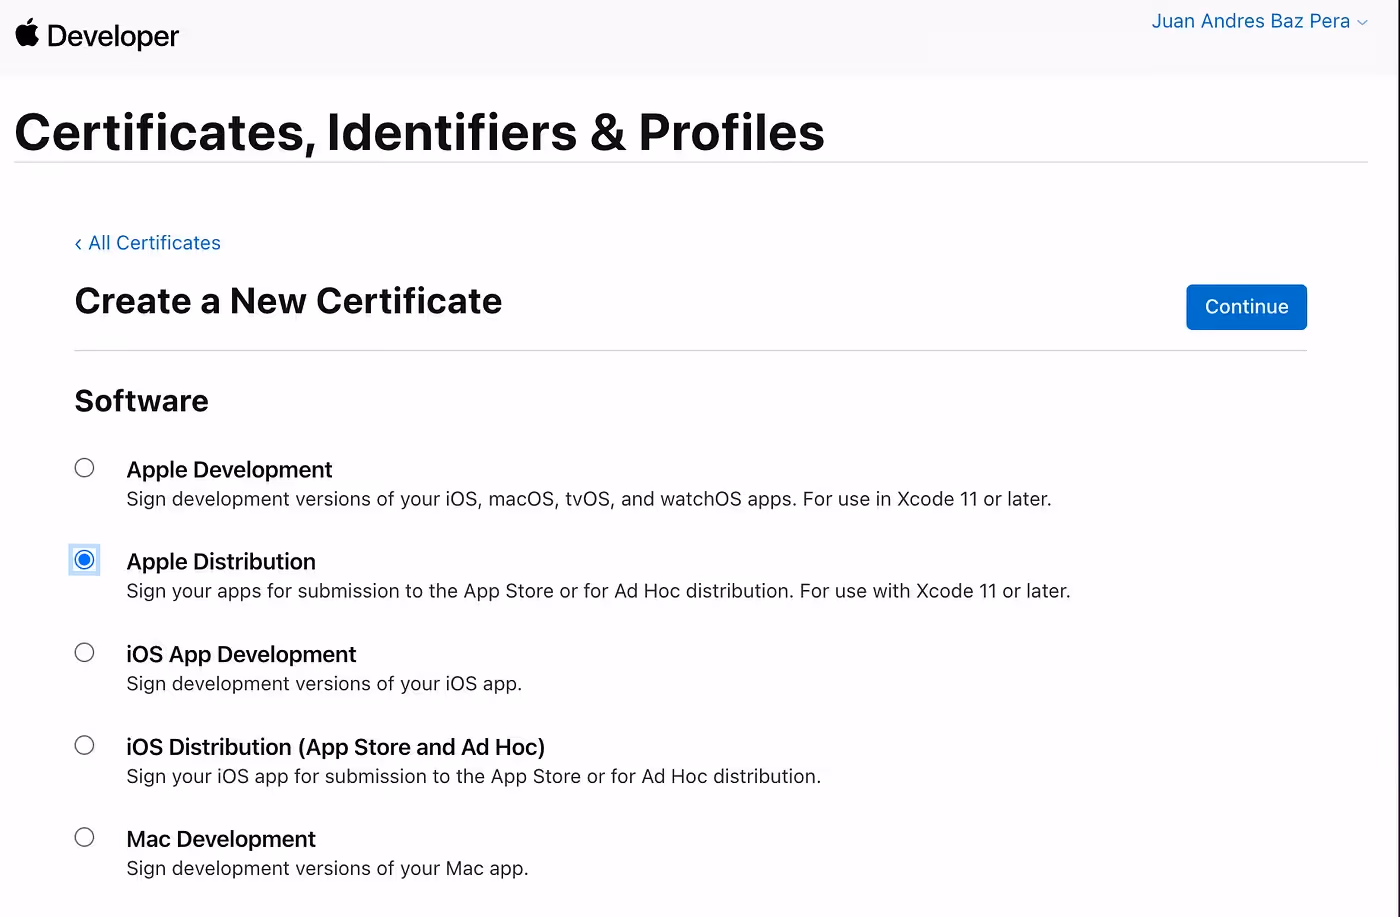
- Click on “+” button
- Select Apple Distribution and press Continue
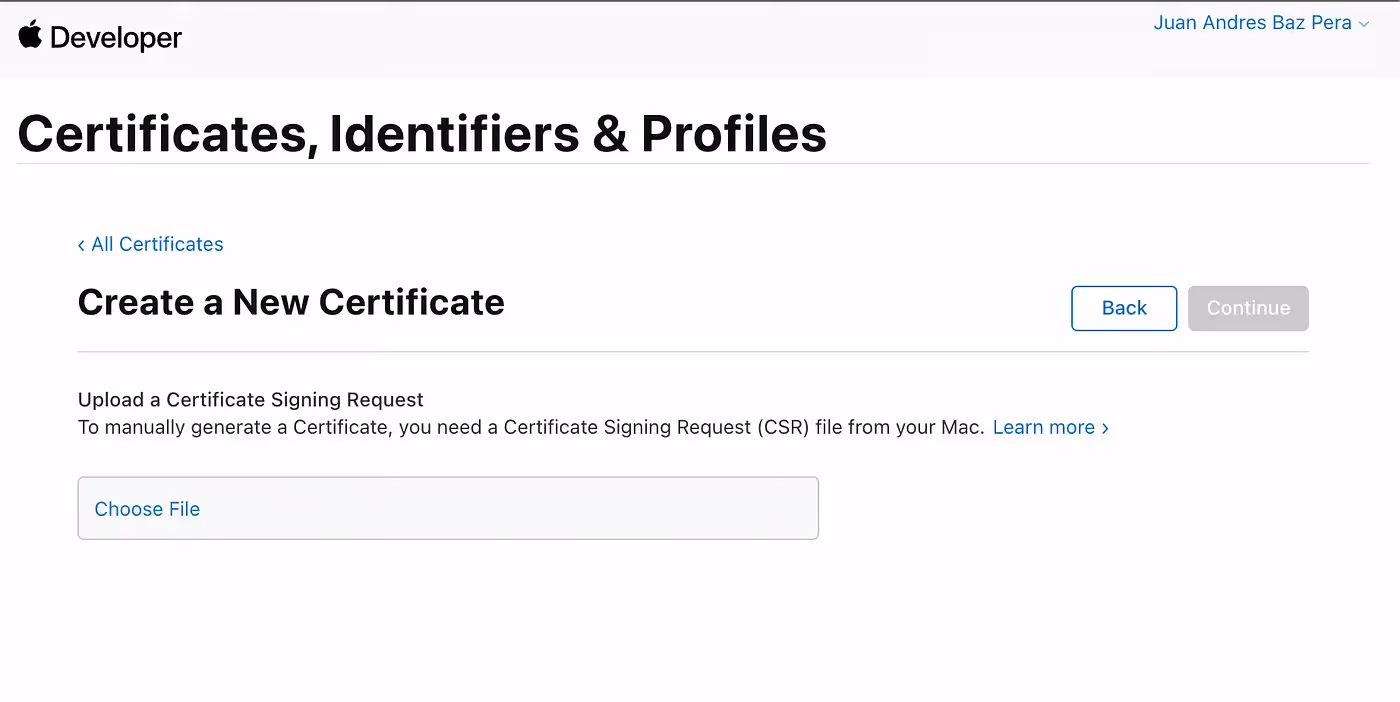
- Upload the certSigningRequest file we created above and press Continue
- On the next screen, download the certificate file (.cer) by pressing the “Download” button and save it in your drive
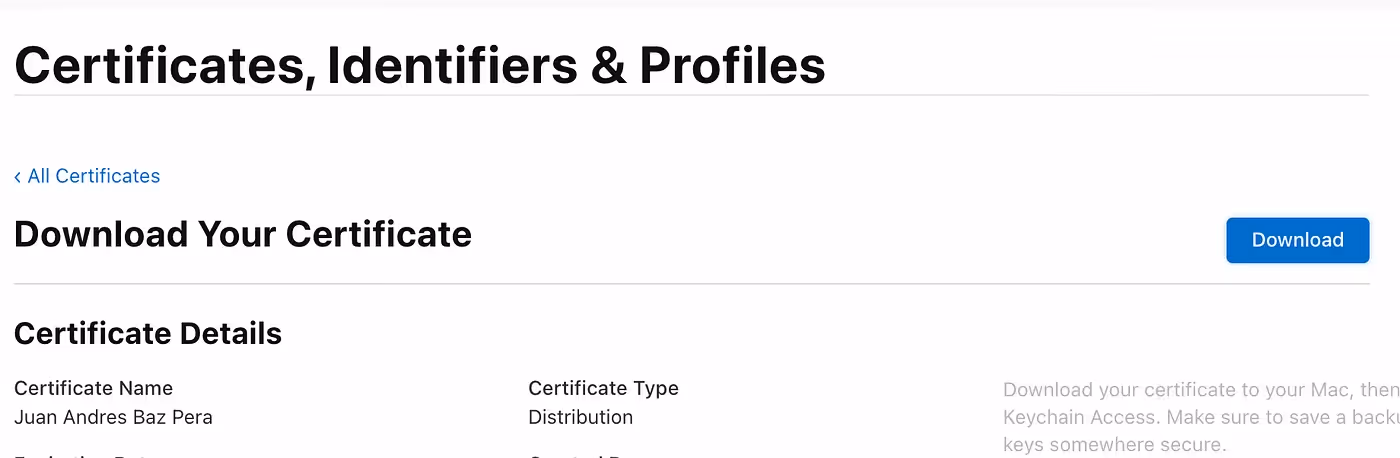
- Once the file is downloaded, in Finder, double click on it and the Keychain Access app should open
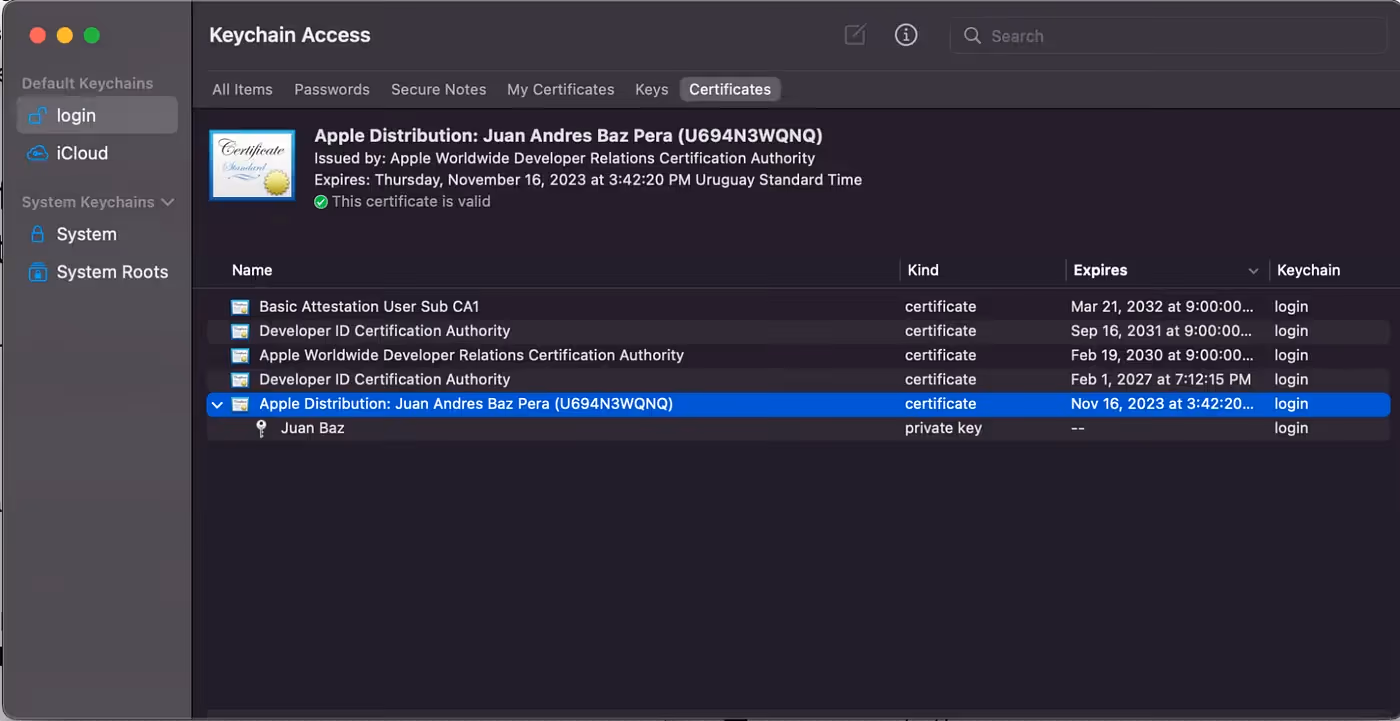
- You can easily find the installed certificate (under the certificates section) by checking the “Expres” column; the new certificate should have the exact date you created it + 1 year (today + 1 year)
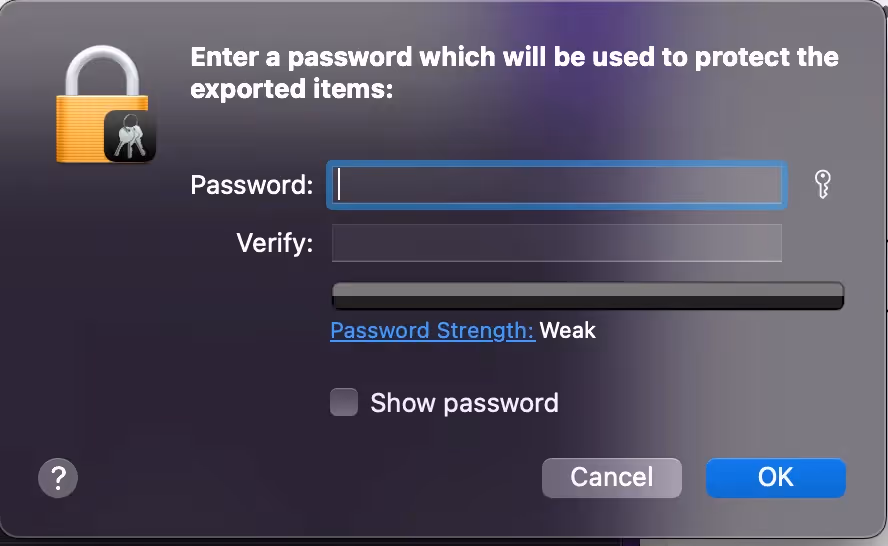
- We’ll export the encrypted certificate and the private key by right clicking on it and “Export Apple Distribution…”
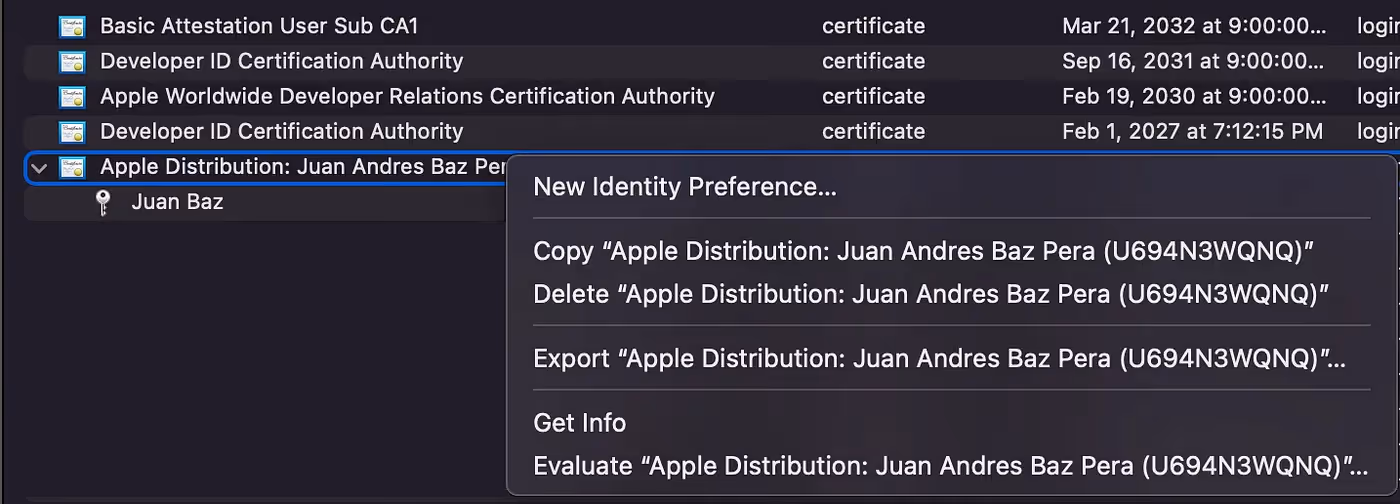
- Put a name and click “save”
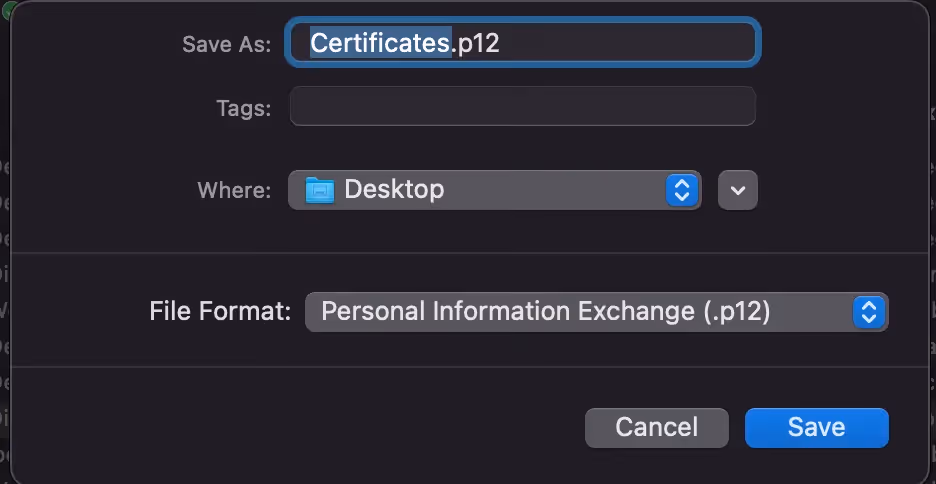
- You will be prompted to create a new password for the .p12 file note that you will share this password with the developer
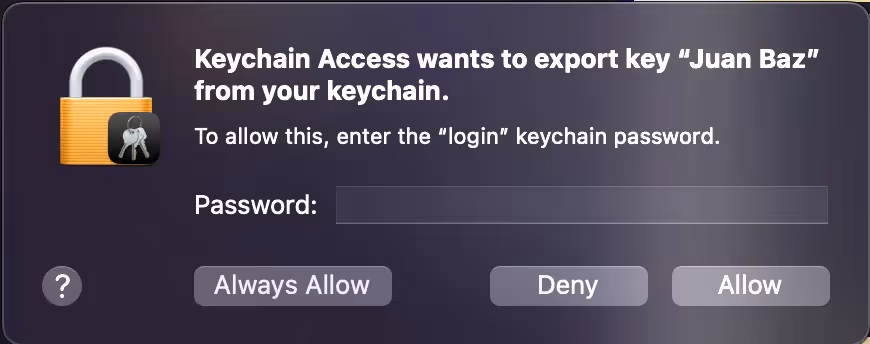
- Then you will be prompted to insert your Macbook password to allow the Keychain Access app to download the .p12 file
- Once you put your password press “Always Allow”
- The .p12 file should be in the path you set (Desktop in our example)
3. [Client] Create or update App Identifier (bundle id)
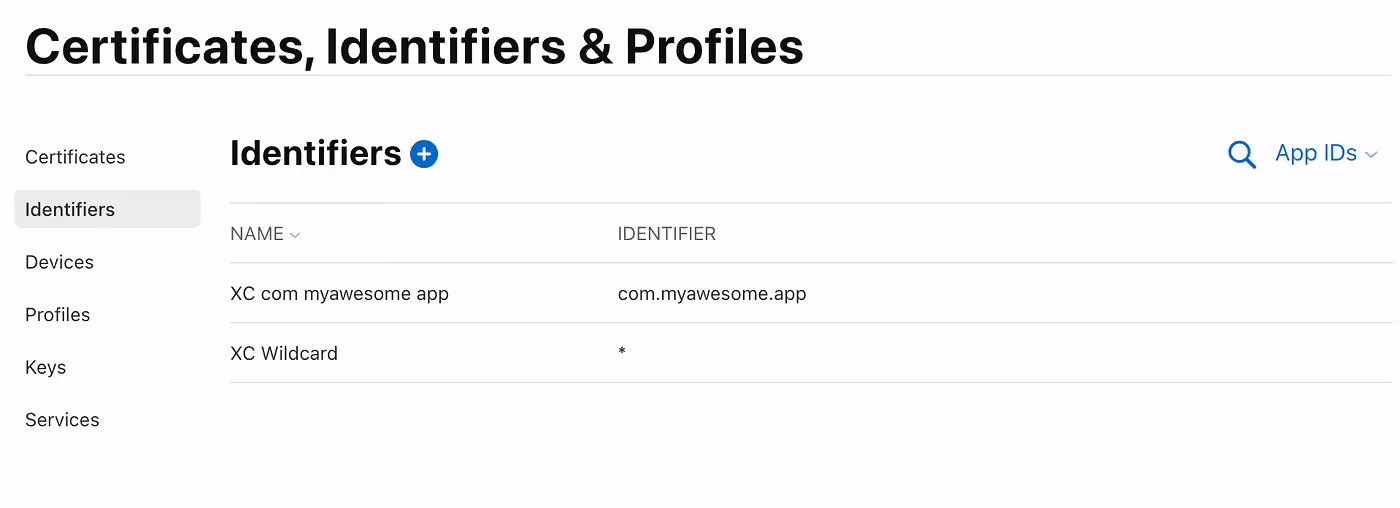
- Go to Apple Developer Account -> Certificates, Identifiers & Profiles -> Identifiers or quick link to Identifiers
- Create a new identifier by pressing “+” button or choose one (ask your developer to know which one you should choose) from the list if you already have one
- If you create one, select App IDs and Continue
- Then, select an “App” type
- Now add a description and a Bundle ID (it should be in reverse-DNS format) Note: You will get to this screen if, instead of creating a new identifier, you chose one from the list.
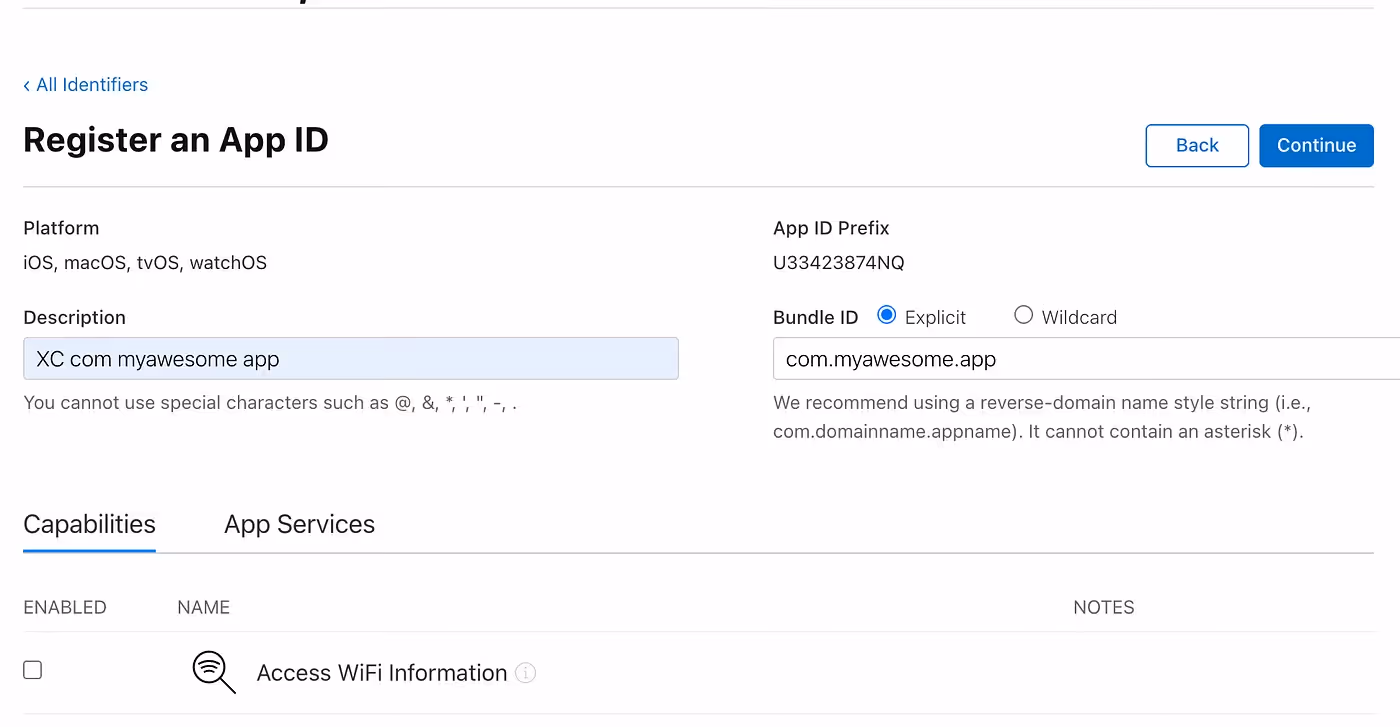
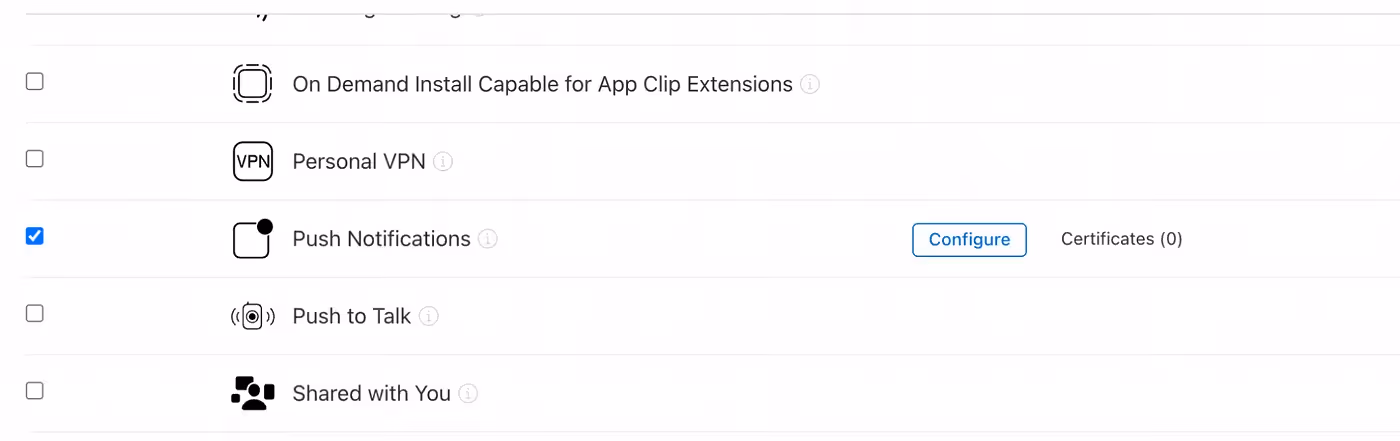
- Ensure you have checked all capabilities you need before “Continue” or “Save” the identifier. Note: Ask your developer about which capabilities will use the app. For this example let’s say we will implement push notifications
- “Save” (If you update one) or “Continue” and then “Register” (If you create a new one)
4. [Client] Now, let’s create the Distribution Provisioning Profile
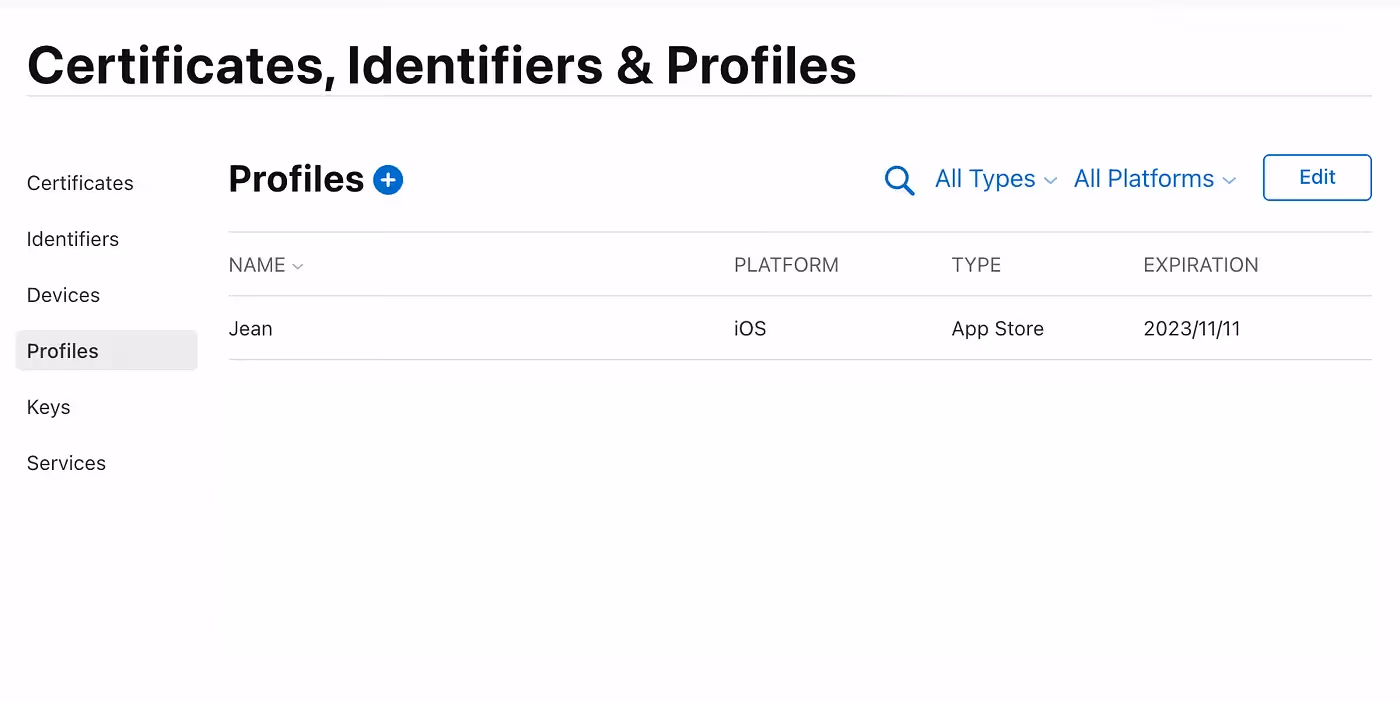
- We already have our Distribution certificate created, so now, we should return to the Apple Developer account and then go to Certificates, Identifiers & Profiles -> Profiles or quick link to Profiles
- Click on “+” button
- Select App Store in the Distribution section
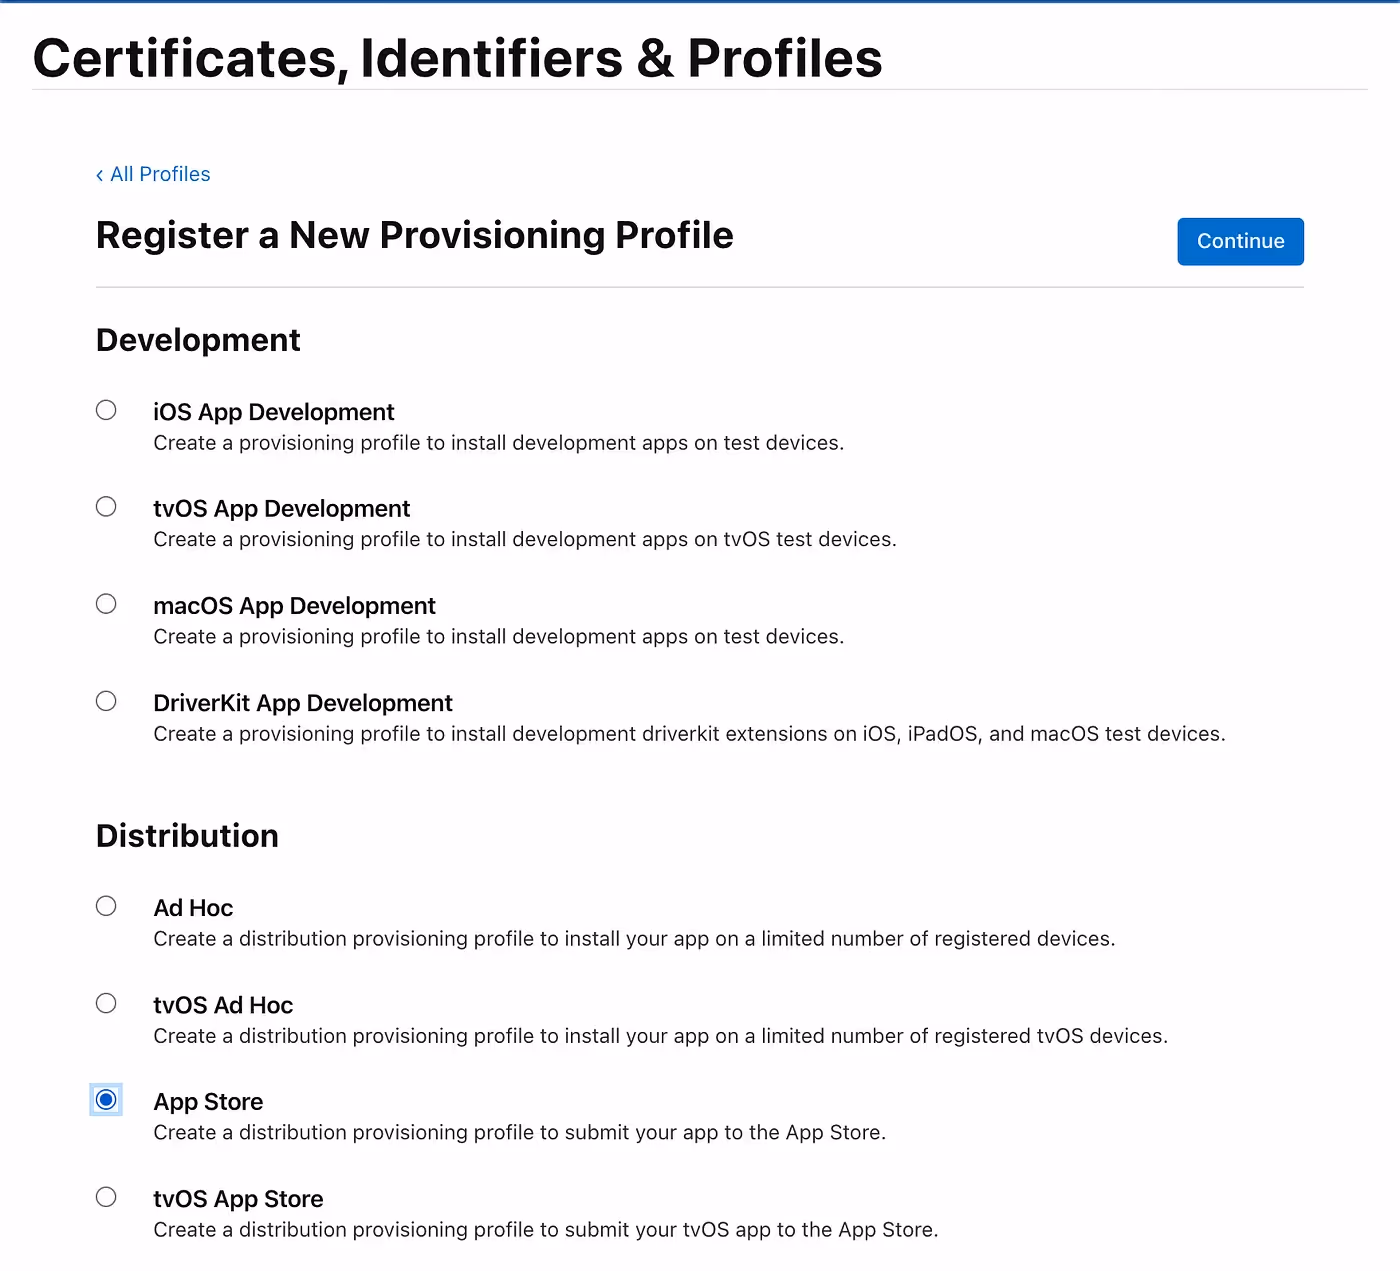
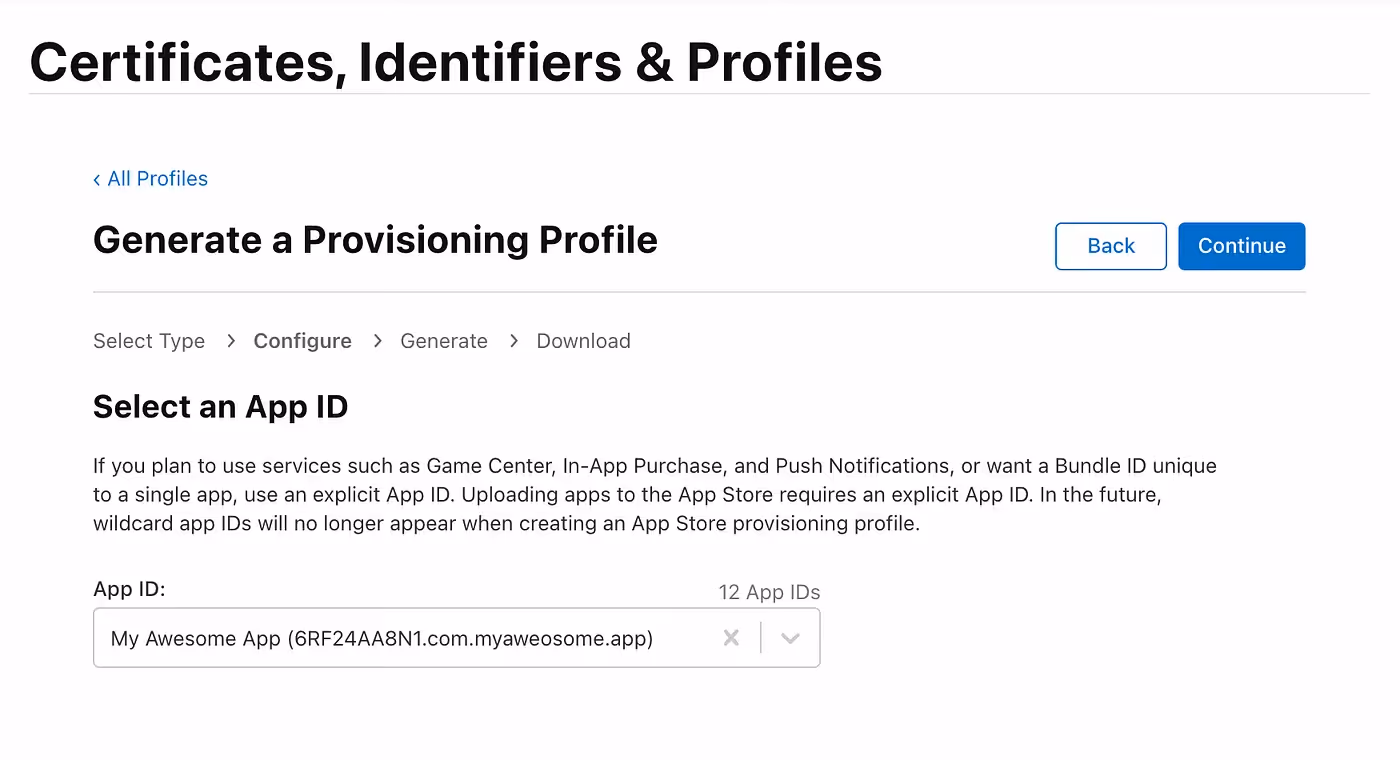
- On the next screen, select the App ID we created above (In this example: com.myawesome.app) Note: App Store requires an explicit App ID.
- Then, click on Continue
- Select the certificate you created in the previous step and press Continue. Note: If there are multiple distribution certificates listed, look at the date, which should be the day you create the certificate + 1 year (today + 1 year), and press Continue.
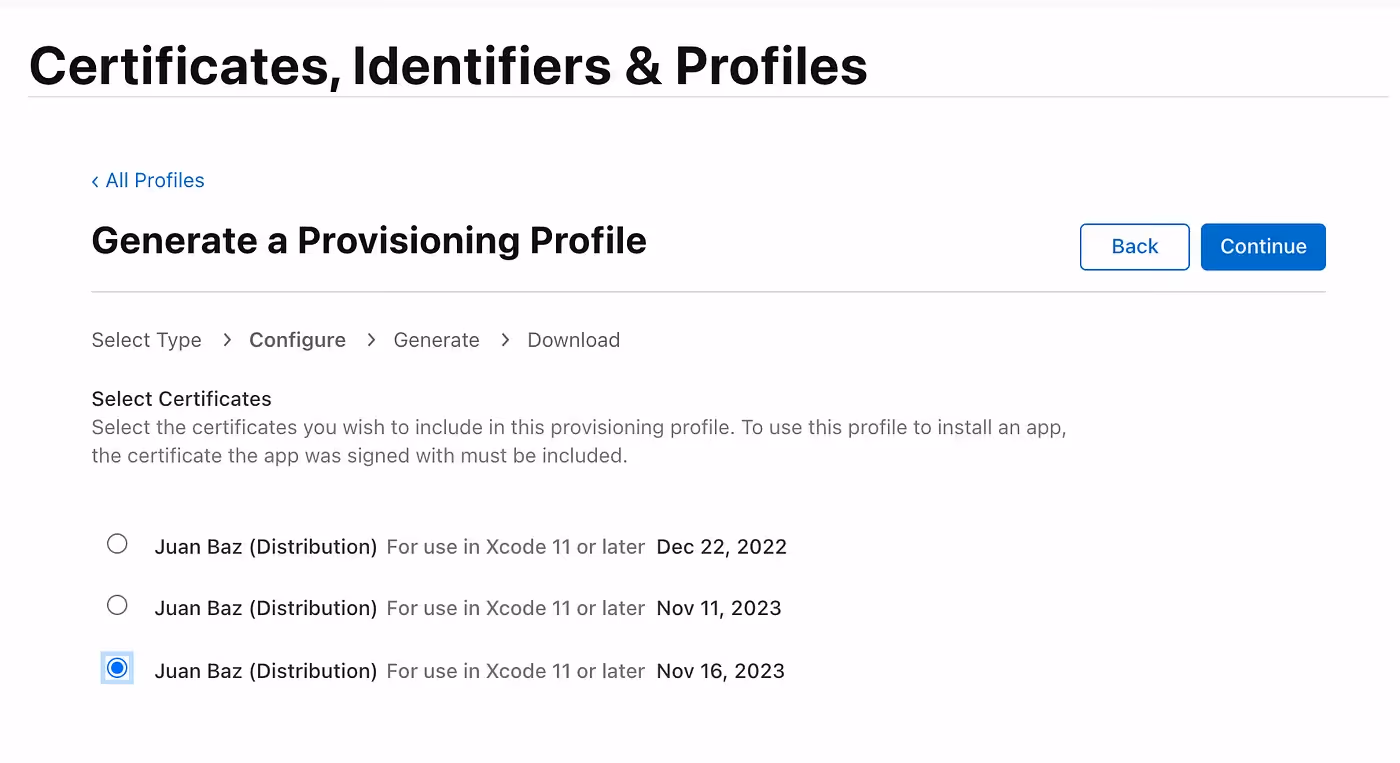
- Give a name to your provisioning profile and click Generate
- You will be redirected to a new page where you can download the Provisioning Profile (.mobileprovision) file
- Download it to your drive
- Now you can take the .p12 file created above (along with the password you created for it) and the .mobileprovision file and give them to your developer.
Important note: Those files should be given to your trusted developer and kept safe at all times.
5. [Developer] Import the Certificate and Provisioning Profile to XCode
- Once both files are downloaded, add your .p12 certificate to your Keychain Access app by opening it, then entering the file password
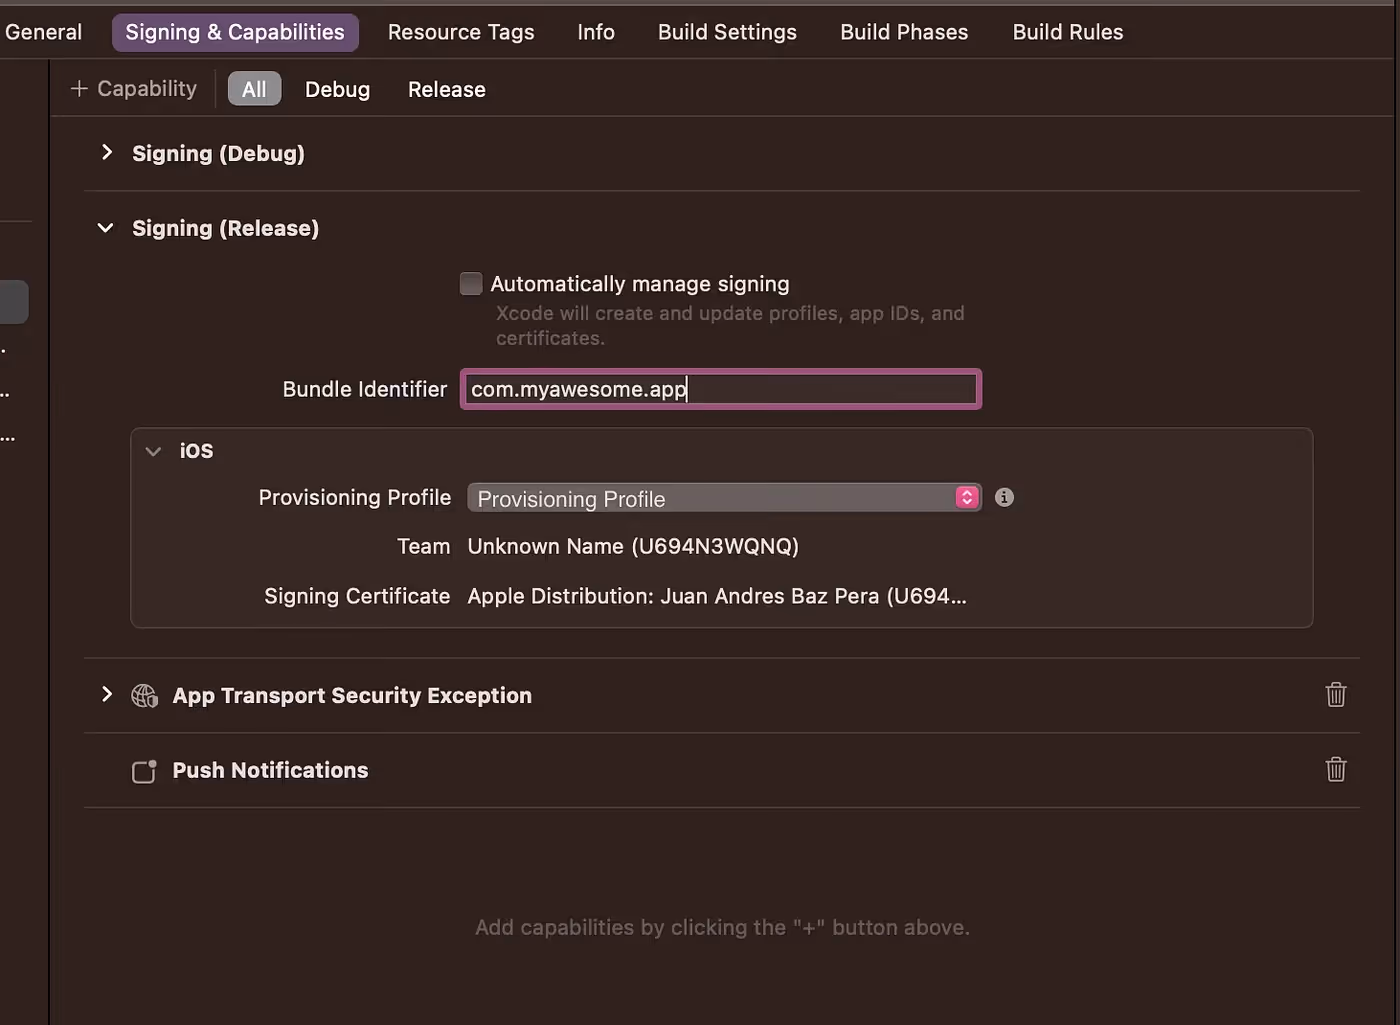
- Finally, on your XCode app, select your app under Targets -> Signing & Capabilities -> Release
- Ensure “Automatically manage signing” is unchecked
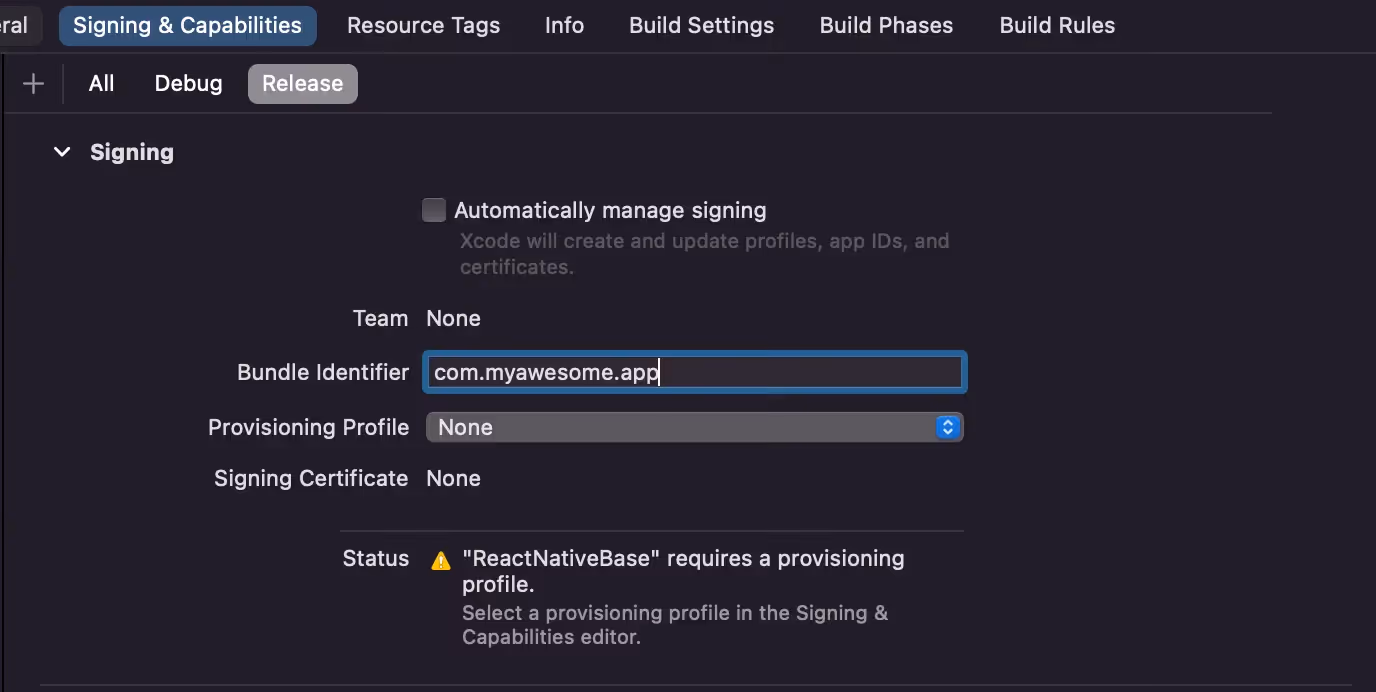
- Select “Import Profile” in the Provisioning Profile dropdown, and open the .mobileprovision file
- Now you will be able to archive and upload the app to AppStore Connect
- XCode will use the Provisioning Profile and Certificate to code sign and upload the app
Conclusion
Code signing and provisioning profiles are some of the most complex things an iOS developer has to deal with.
The process for organizational accounts is transparent for the developer since XCode generates a distribution certificate and provisioning profile on the fly when you create a bundle on the archive process.
Unfortunately, it is not so easy when we are not the owner of the application that we want to publish.
Although all of this effort is very tedious for the developer and even more for the client, it will keep our applications highly secure and clarify who is the application’s owner, and who is its developer.


