


When we take our first steps into the mobile development of apps, we first need to create an effective build, either to test them on real devices or to launch them into production.
Although the process of creating builds is simple, there’s an overwhelming amount of information about it, and as such, this can make developers hesitant to make their first attempt.
Here’s a step-by-step tutorial on how to create successful app builds for Android. If you need to distribute and upload an app on iOS you can check this blog I wrote.

To create and upload an app to the Play Store, you first need to make a Play Store Console account.
Once you have a Play Store Console account, go to “All Apps” and click on “Create App”. Here, you’ll fill in some information about your app. You can read more about this here.
Now we are ready to create the build by following these steps:
- Open your project on Android Studio
- Make sure the app works properly in the emulator
- Click on “Generate Signed Bundle / APK…” under the “Build” tab

This window will appear:

Select “Android App Bundle” to upload the build into the Play Store Console, then click “Next”.
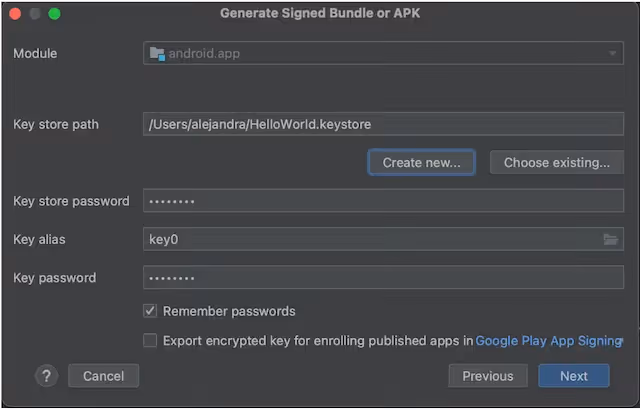
Here, you need a KeyStore path. If the project already has one, you must download and use it. But if you don’t have one, click “Create new…” to create it. You’ll see the following form where you will complete with your app’s information.
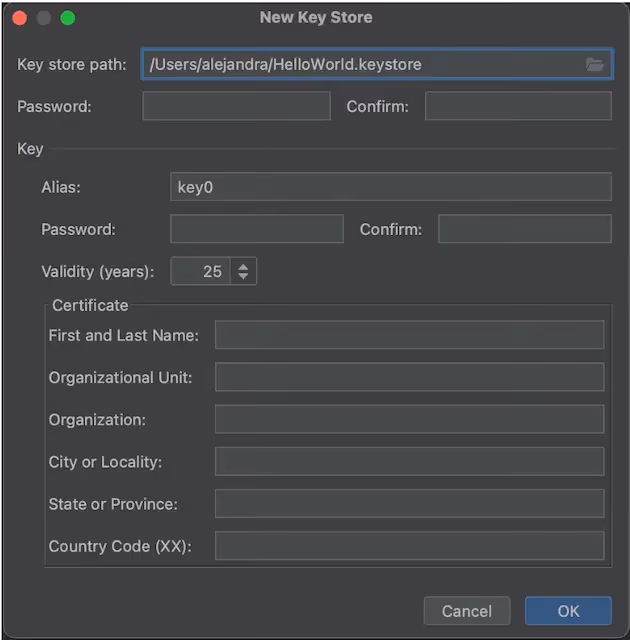
I recommend saving these passwords and the KeyStore path so you can share them with the rest of your team after completing this process.

Select the type of release you want. For uploading to the Play Store, choose the release option.
After this, the system will create the build. Once it’s finished, you will see this notification:
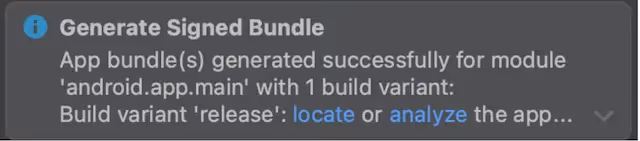
Click on “locate” and you will see the APK you will upload to the Google Play Store.
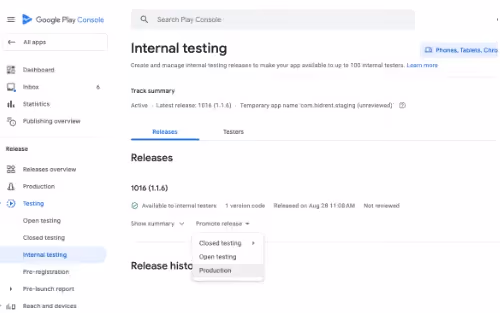
Once you reach this step, go to the Play Store Console, and open the app that you created earlier. Next, you’ll open “Internal Testing” under the “Testing” menu on the left.
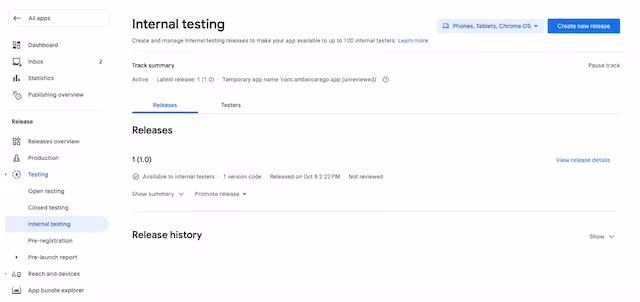
Then, click on “Create new release”.
This screen will be displayed:
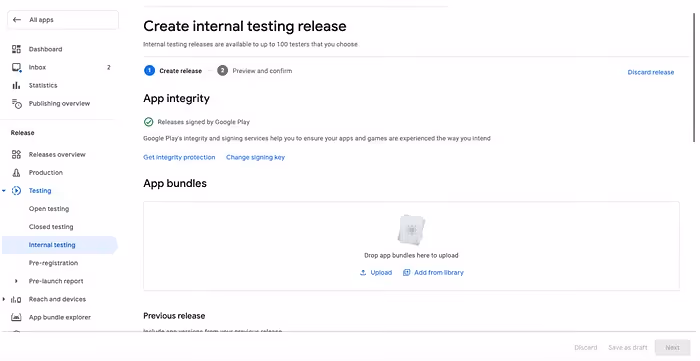
Then you must insert the APK that you created in the previous steps. Drag it to App bundles, and the file will be uploaded. Once this is done, click on “Next” and then “Enroll out a Release”.
At last, the release will be created. At this point, all that’s left is to make your testing group and send each participating individual the app so that they can test it. To take care of this, go back to the “Testing” menu and click on “Internal Testing”.
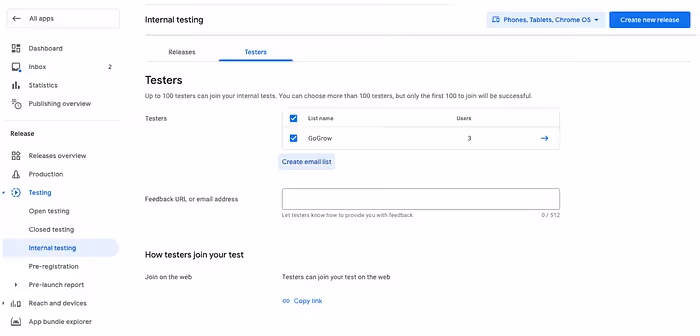
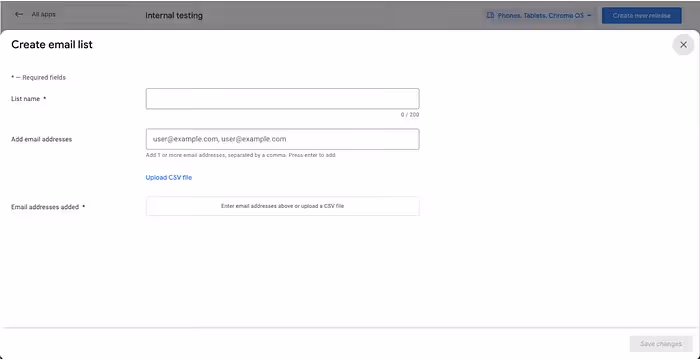
If you don’t already have a group of testers, click on “Create email list”, and this screen will be displayed:
On this page, you can add each testing individual to the project. Once they receive the invitation to join, you can send them the link so that they can immediately start testing the app.
An important detail to remember is that the testing user must be logged into their device with the same email that was used to add them to the list. Also, the user has to have the “internal testing” setting activated on their Play Store account. To activate it they need to follow these steps:
- Open the Google Play Store app
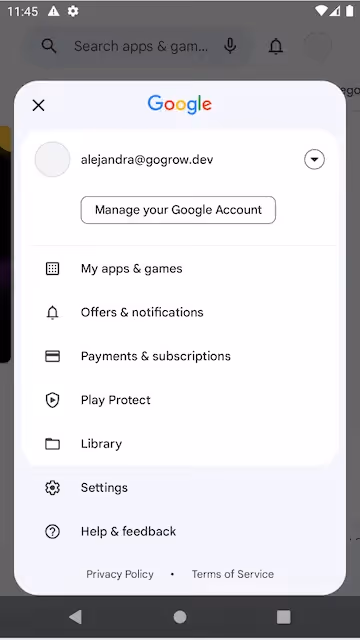
- Click on the circle with their profile image to open the drop-down menu
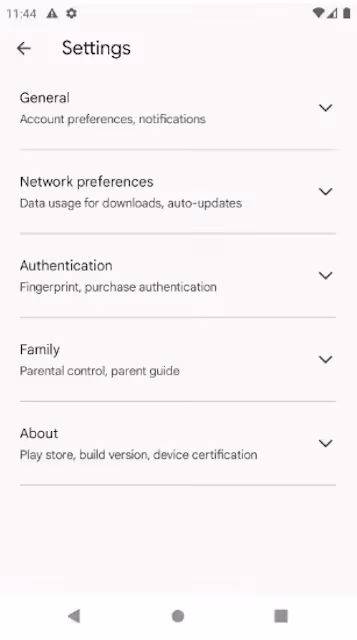
- Go to “Settings” at the bottom of the drop-down menu
- In the “About” section, tap the Play Store version 7 times
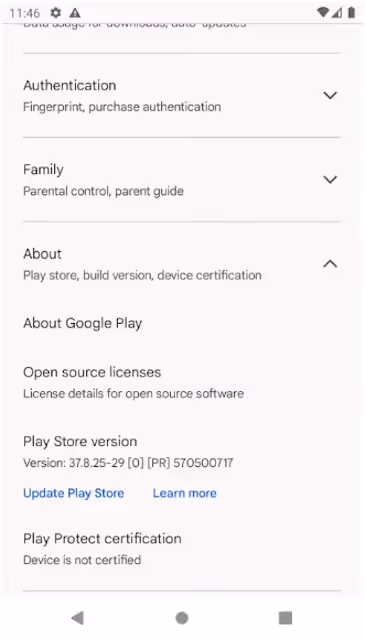
After clicking seven times, they will see this message: “You are now a developer!”
- After the Internal app sharing setting appears (found under the “General” menu in “Settings), tap the switch to turn on internal app sharing
At the end of testing, you’ll be able to determine whether or not your app is ready to be uploaded into production. If it’s good to go, you’ll need to set up the app screenshots and description that the user will see on the Play Store.
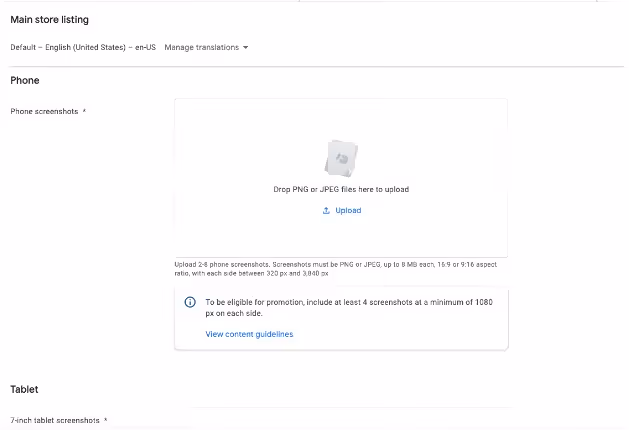
To do this, click on “Main store listing” under the “Grow” menu. Doing so will take you to the “Main store listing” page, where you will fill in the app name, the app description, and all the necessary screenshots. This is where you can also insert the app’s icon and other graphics.

Then you’ll need to go to your Play Store Console account and select the release that you want to send to production. Once you get there, click on “Promote Release” and then on “Production”.
Next, you will need to fill in the app’s version name and release notes.
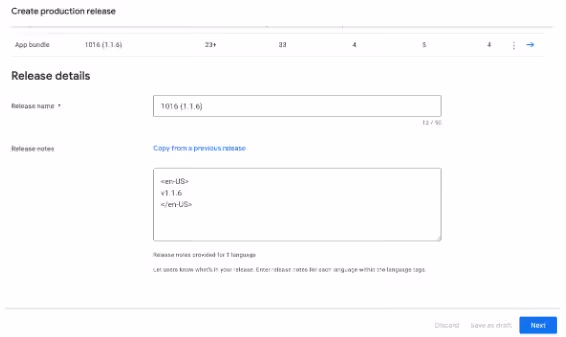
After this, click “Next” and your application will be ready for review by the Play Store.
Once you pass the review, the Play Store will upload your application and make it downloadable!
Good luck with creating your first app builds! If you have any questions, feel free to ask in the comments.


