


When we take our first steps into the mobile development of apps, we first need to create an effective build, either to test them on real devices or to launch them into production.
Although the process of creating builds is simple, there’s an overwhelming amount of information about it, and as such, this can make developers hesitant to make their first attempt.
Here’s a step-by-step tutorial on how to create successful app builds for iOS. If you need to distribute and upload an app on Android you can check this blog I wrote.

iOS Builds
When uploading an app to the App Store, you need to know some essential things.
You will need an Apple Developer account to create and upload a build to the Apple Store. If you don’t have one, creating an account costs $99 a year for both individuals and organizations.
If you need to use another user’s account to distribute the build, you can get more information here
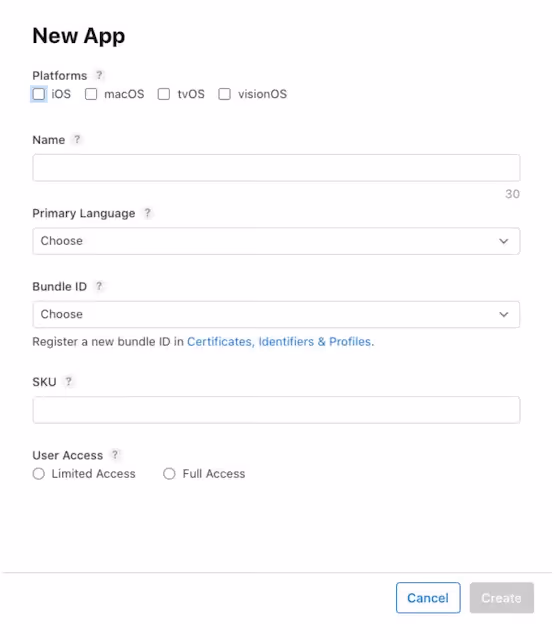
To create a new app in the Apple Developer account, go to Apps and click the add button (+). Then from the pop-up menu, select New App. When you click on it, it will show the form you need to fill out with your app’s information.
Then, set the services, certificates, and profiles to the app. You can find more information about the data you will enter here
Once you’ve completed this process, you’ll be ready to create a new build
- Open your project in Xcode
If this is the first build for your app, you’ll need to set the necessary certifications. To do so, go to the “Signing & Capabilities” tab and import the certification from there.
Once you get to this tab, click on the “Automatically manage signing” box, then select the correct Team. Once you choose the Team, the certificates will be automatically downloaded.

After you’ve completed this step, log in to your Apple Developer account and import the profile certification.
2. Test your app in the simulator
3. Create the Build
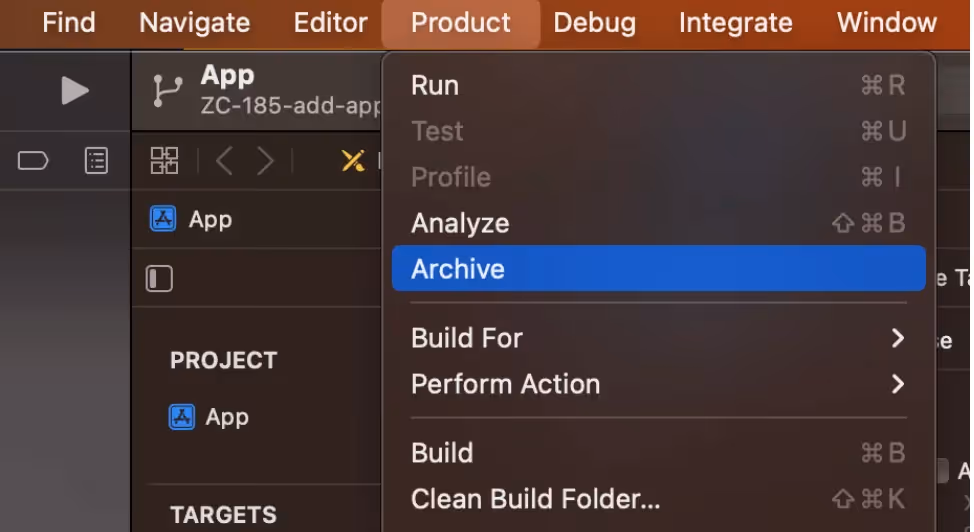
For this step, I recommend cleaning the build folder beforehand, to avoid possible build failure. To do this, you need to go to the “Clean Build Folder…” under the “Product” menu.
Then, go to “Archive” in the “Product” menu to create the build.
Once the build is successful it will appear on this screen.
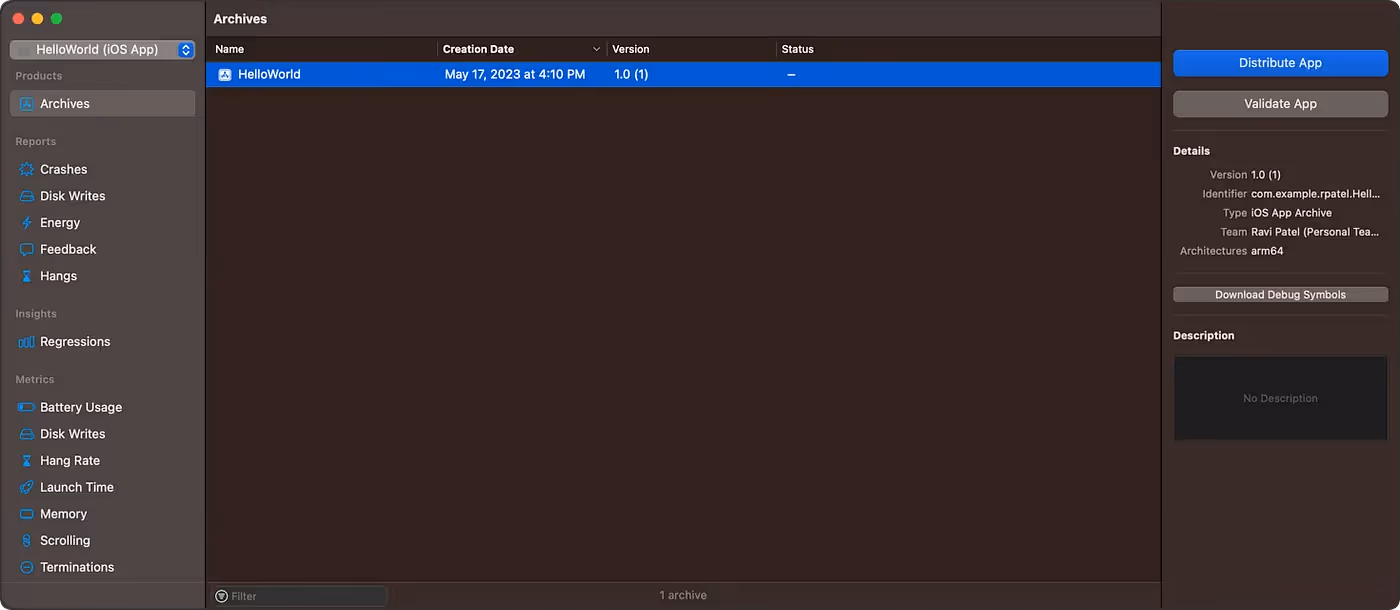
Now that you’ve reached this step and have created the build, all that’s left is to upload the project to the App Store. From there, you can either test it on TestFlight or launch it into production.

Then select “TestFlight & App Store” if you want to distribute your app on TestFlight and also submit it to the App Store. Or, select “TestFlight Internal Only” if you wish to test the app internally, and then click on “Distribute”.
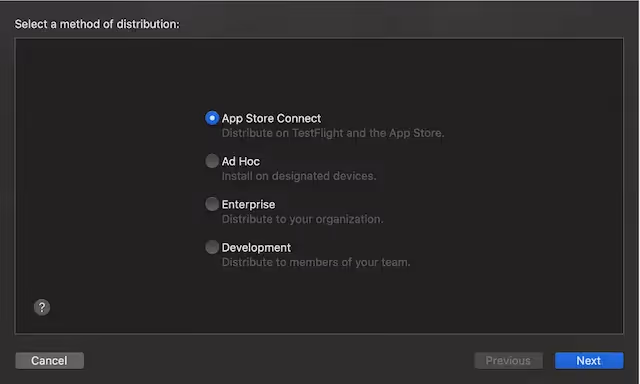
Here we click “Apple Store Connect” to distribute the app. The other option is for a custom distribution, which you can read more information about here.

Select the “Upload” option and then “Next”
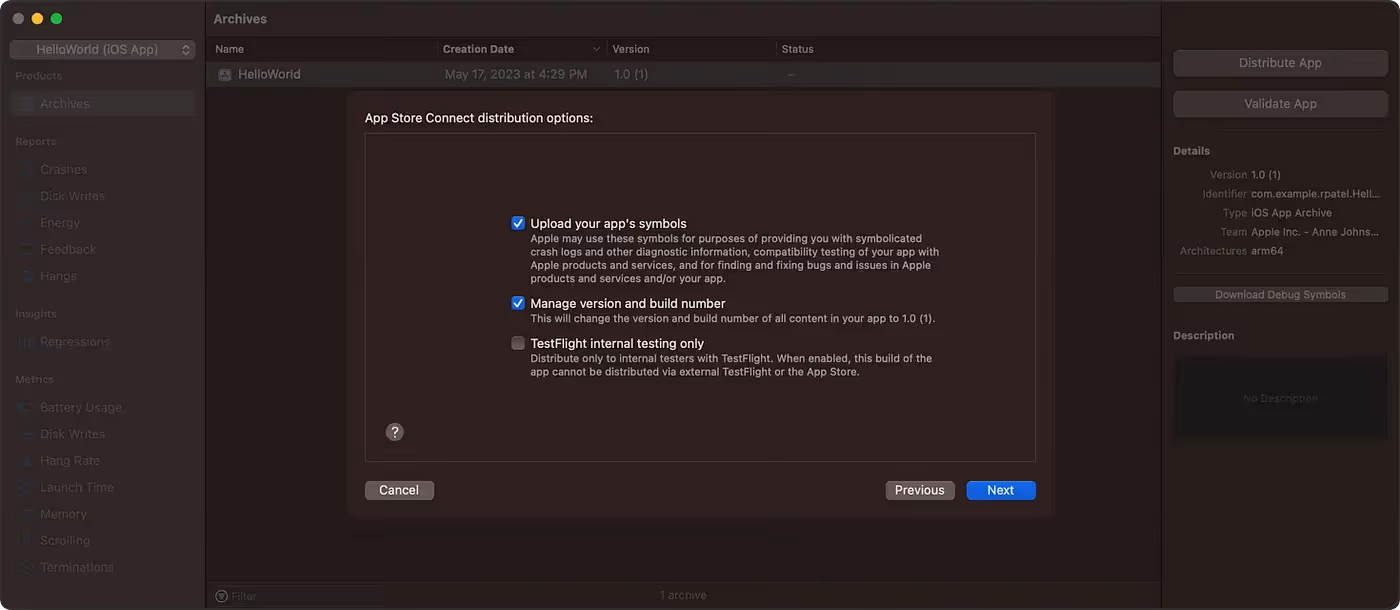
Here we choose how to manage symbols and the builds numbers. Selecting this option allows Apple to provide crash logs and more diagnostic information while also allowing it to update the build number in our archive.

Click on “Automatically manage signing”. This allows Xcode to manage signing and obtaining the required certification for us.
Then, click on Next, and the app starts distributing to the App Store.
Now, must open your Apple Developer account and go to Apps. Select the app you created earlier and go to the TestFlight tab.

After the app has finished loading, you can manage the tester’s access and invite people to test the app. Once the invitations are sent, the invited users will receive an email that says they were invited to test the app and also contains a link to download TestFlight. They should download it on their device and log in with the Apple ID. Once you have TestFlight you can download your app and Test it on your phone.
If you don’t already have a group of internal testers, you must create one by clicking the “+” button next to Internal Testing. From there, you’ll create a group and add the people you want to your project. If you don’t have any people in the project yet, you can add them in Users and Access by clicking on the “+” button.
Complete the user information form. Once the user accepts the invitation, you can add them to an internal testing group.
As soon as you’ve tested the app and ensured that it’s ready to be uploaded into production, you’ll need to go to your Apple Developer account and go to the app you want to upload to the Apple Store. If you enter the app, you will see a version of the app that says “Prepare for Submission”.
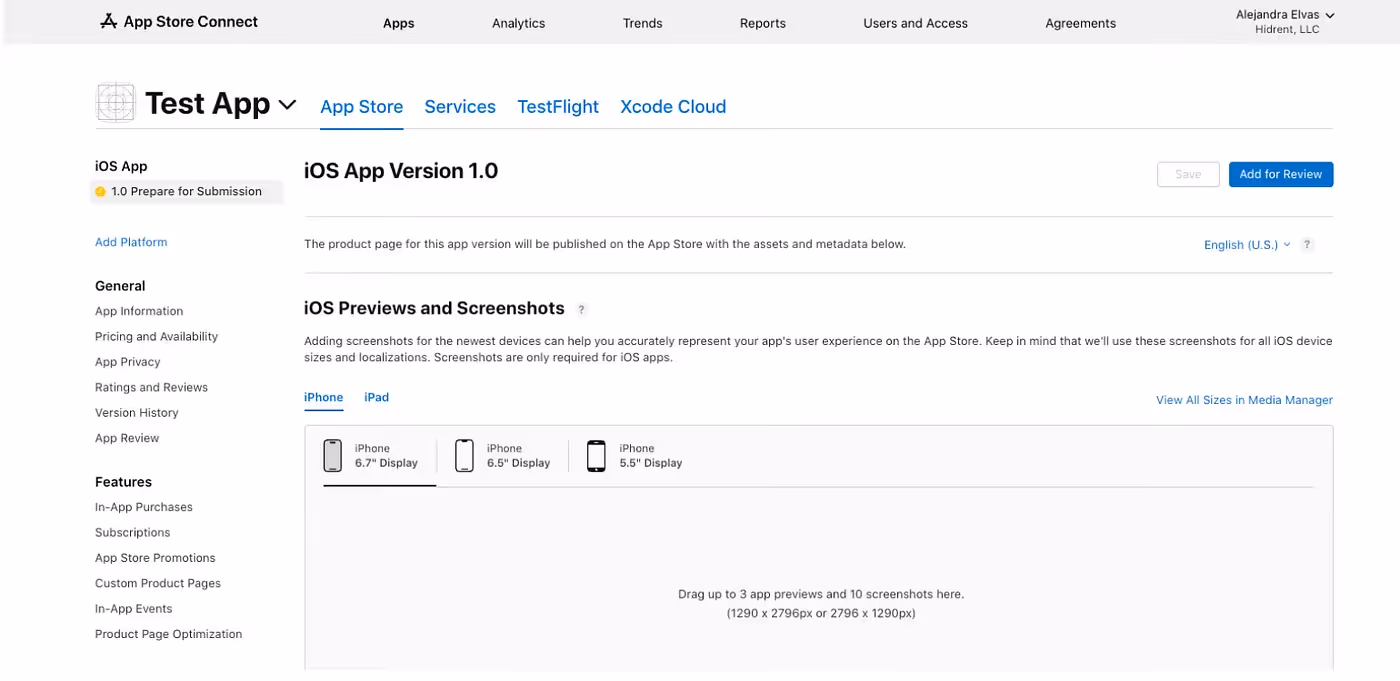
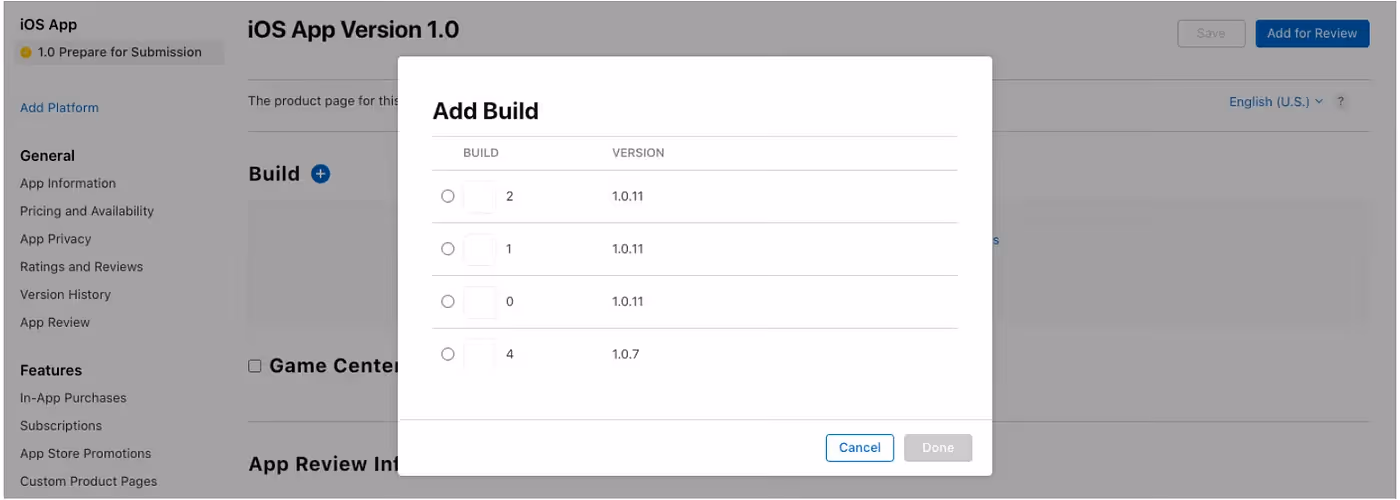
After you’ve confirmed your app’s information, you will need to upload the following items: the app screenshot that the user will see on the App Store, promotional text, a description, and the keywords to find your app on the App Store. After completely uploading all of your app data you will need to choose a build from your created builds.
Next, you will need to complete the app review information, which is your contact information. Filling this out will allow Apple to let you know if the review is ready or if there is a problem in the process that needs correcting.
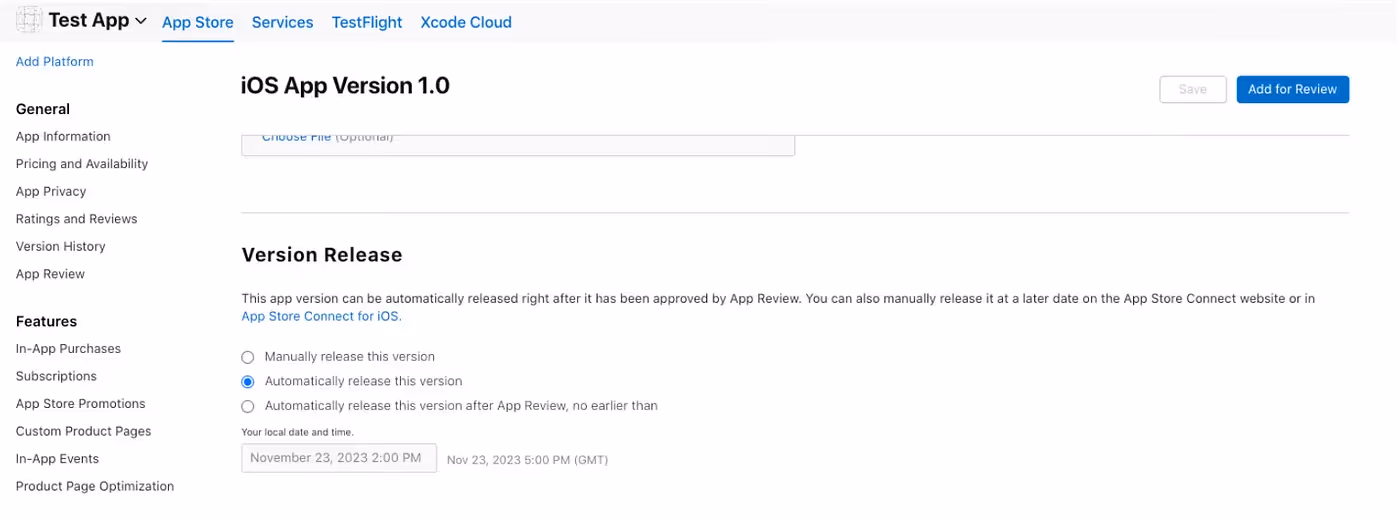
Finally, you can choose how to release the app. You have the option of manually releasing the app, or allowing it to be automatically released once its review is finished.
When you’ve guaranteed that it’s ready, you can submit the app for Review by clicking on the “Add for Review” button.
Apple will send you an email after they finish reviewing your finished app. In this email, they will explain the results of the review. If they determine that the app is ready, your first completed app will be uploaded to the Apple Store!
Good luck with creating your first app builds! If you have any questions, feel free to ask in the comments.


